Configure SAML SSO with Okta
Last updated: November 9, 2026
Work with your Okta administrator to connect SAML sign-in. The product is called Consensus Live; the identity-provider integration may still be listed as Saleo.
Get your organization’s Okta values
Sign in to the Okta Admin Dashboard.
Add or open the Saleo application.
Use that application’s organization-specific SAML setup instructions to obtain the sign-on URL, issuer, and certificate.
Use your own application values. Generic examples cannot replace your organization’s SAML configuration.
Configure Company Settings
Sign in to the Consensus Live web portal as an admin.
Open Settings → Company Settings.
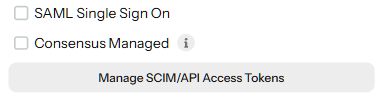
Configure SAML Single Sign On with your identity administrator.
Enter the SAML Sign On URL, SAML Issuer, and SAML Cert supplied by Okta.
Review the values, then select Save Changes.
Map user attributes
In Okta’s Profile Editor, open the Saleo application profile. Configure these SAML attributes:
Name | Value |
|---|---|
firstName | user.firstName |
lastName | user.lastName |
seatType | appuser.seatType |
Add a seatType attribute if it is missing. Use the appropriate assigned value:
admin: Admin access.
user: Demo Creation access.
view: Sales access.
Review whether the attribute is managed at the user or group assignment level before assigning it. Test an assigned user with the intended seat type.
Validate sign-in
This integration supports IdP-initiated SSO and Just-in-Time provisioning. Launch the application from Okta and confirm the expected user and role. Contact Support if your team needs SSO-only enforcement.
For service endpoints and signing settings, see Configure SAML-based SSO.